Assemble 3D Printed Mandalorian Gauntlets: Gen 3 Guide
Complete Gen 3 gauntlet assembly guide with threaded inserts, brass tubing, and electronics tray. Step-by-step instructions for printing and building.
TUTORIALS

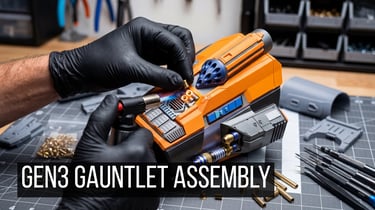
So you've downloaded and printed my Gen 3 gauntlets. First off, thank you. But you're probably asking yourself, "Well, how do I RTFM if there's no M?" Simple. This guide will show you how to go from a pile of 3D printed parts to fully assembled gauntlets, ready for painting and electronics. We're covering threaded inserts, brass tubing for the flamethrower, the electronics tray, and everything else you need to know.
Essential hardware + upgrades
Knurled brass nuts (aka threaded inserts)
Screws: M3 x 12mm for whipcord; M3 x 12mm for Fenixito; M3 x 12mm for Boba Fett style whistling birds; M3 x 16mm for Din Djarin style whistling birds. Go for an assortment box in Black finish or this assortment box in Silver finish
Round brass tubing for the flamethrower
Stainless Steel rods for the hinge 1.5mm x 300mm (will fit if scaled up to about 110%, and for scaling down, I recommend welding wire from your local hardware store)
The Din Djarin style whistling bird is built to work with Concordia Arms' Universal Din Djarin Whistling Birds kit
Make sure to read the included Gen3 Gauntlets Instructions and specific parts Notes in the zip file for more insights!
Why Use Threaded Inserts?
You don't have to use threaded inserts. If you've decided on the parts you want and you're never planning to take them off, just glue them on. But I created this screw attachment system for two reasons.
First, if you want to build your gauntlets now and add electronics or lights later, you can easily remove parts and install whatever gizmos you want. Second, painting. It's way easier to paint pieces separately than when they're attached. You can get in and do fine detail work without masking around assembled parts.
If you do want to use screws, you'll need M3 screws and M3 threaded inserts. I use M3s because I got a lot of them. You could also go with M4 screws and M4 threaded inserts if you want, they're bigger and will probably fit the holes just fine.
The Spacer Solution
The threaded inserts I originally designed for got smaller and better over time, but I didn't adjust the holes because the model was already out there and I would have had to adjust holes on every single model. Yeah. So what I did was I came up with a solution.
In Orca slicer, I made these little cylinders, these little spacers that once you prep the hole, you can just put them right in. I'll provide the STL file for these spacers, but you can make them yourself in Orca.
👉Grab your threaded insert spacer STL file here
Also, I don't know if you can do this in Cura. Cura is a very old slicer and I don't know what kind of updates it gets. If you want to use something with more utility, I'd switch to either Orca or PrusaSlicer.
Prepping the Holes
Grab your drill and use it to open up the holes just a little bit. You're not drilling into it, you're just widening the hole. The drill will naturally stop when it hits the bottom as long as you're not applying pressure.
There are only six holes to prep unless you're doing both gauntlets (then you'll have twelve total). For the flamethrower, hold the piece steady and drill straight in. This took me less than a minute for all six holes. Very quick.
Installing the Spacers
Once you've opened the holes with the drill, the spacers will fit right in. One side is going to be cleaner than the other depending on how you print them. I always use a skirt because these small parts tend to pop off the bed. I print them very slow at about 20% speed.
Press the spacers in with the cleaner end going in first, and get them flush with the surface. You can use a flat tool to help press them down, but they should fit all the way down. Sometimes they're stubborn. If one goes in crooked or feels deformed, just pull it out and use another one.
Heat Setting Threaded Inserts
Here's the process. These threaded inserts have a distinct top and bottom. The side with the edge and no knurling is the bottom. That goes into the hole. The top part is clearly knurled (textured with a pattern).
Put the screw in on the knurled section and thread it all the way on till you're just seeing the bottom of the screw poking out. You don't want it sticking out, you want it flush with the bottom or even inset just a little bit. Not too much. Just a little bit.
Now, they do make a tool you can put on the end of a soldering iron and press fit these in without a screw. That's great. That's extra stuff for me to break out that requires power. So I just do it this way. It works great for me. It's super fast.
Take a little butane torch and heat up the brass. Just the brass. I mean, the screw will heat up too, so don't touch this when you put it in. Heat it for about 10 seconds, not too long. Then just take it and push it right in. Install it into the hole. It will actually stop when it hits the bottom.
Check your alignment. Make sure the screw is properly aligned and perpendicular to the surface. You don't want screws going off at weird angles. If you need to adjust, the plastic is still hot and moldable for a few seconds after insertion.
Electronics Tray Installation
The electronics tray is designed to hold 1.3 inch OLED displays from Mandolonyx and Hephaesus Props. The 1.8 inch version is too big for this tray.
The tray has a specific orientation. The inside (where your electronics go) faces inward toward the gauntlet interior. The outside (smooth surface) faces out. Position the tray so it nests into the curved shell of the gauntlet.
Now you need the two rest pieces that create a shelf for the tray to sit on. Each rest piece has two angled ends. One angle is steeper than the other. The steeper angle always goes towards the back of the gauntlet. The shallower angle goes toward the front. This helps the rest piece conform to the interior curve of the gauntlet shell.
Clamp the rest pieces in place. Then take your X-Acto knife and use the back of the blade to scribe along the edge where the rest piece contacts the gauntlet. You can also use a file, a sharp point file, or even a Sharpie. You're creating a little etched line that marks exactly where the part sits.
Important: The section of the rest piece where the tray actually sits (the shelf part) should NOT get glue. You want to be able to remove the tray to service electronics. Only glue the vertical sections that attach to the gauntlet shell.
After you've scribed the perimeter, scratch up the surface that will get glued. This gives more surface area for your super glue to adhere to. You can do this with the back of your blade or with 80 grit sandpaper. Just scratch up that area inside your scribed lines.
Hit the sanded area with accelerant. Then put a very thin bead of super glue along the scored line. Use a toothpick or swab to spread it thin. You want to stay in your scribed area.
Pop the rest piece in and hold it for 3 to 5 seconds. Even though the accelerant has evaporated, it leaves enough residue on the surface to make the glue set quickly. Repeat for the second rest piece.
Now the tray should slide in and rest on those two shelf pieces. It should be removable for accessing electronics.
The Back Piece
The back piece covers the rear opening of the gauntlet and holds the tray in place. This piece should be removable so you can access your electronics. Do not use superglue to attach this. You have two options: very small screws or hot glue.
If you use screws, make sure they're small enough to go through the thinner sections and short enough that they won't poke out the top of the gauntlet. I bought a bag of these little tiny Phillips head screws that I use for my life support box. They're very small but long enough to work.
I'm using industrial grade hot glue. Not the craft stuff for kids, but Gorilla Glue industrial formula. It holds up to heat and it's removable, but not easy. The whole point of using hot glue is that it's removable and you can ultimately get the part back off if you need to service your electronics.
Apply a small amount of hot glue to the edges where the back piece contacts the gauntlet. Don't go overboard. If you get a little bit onto the tray area, that's okay because hot glue is removable. Hold the piece in place long enough for the hot glue to cool and set.
Hinge Installation
These gauntlets use 1.5mm stainless steel rod. You can also use piano wire, but piano wire has a tendency to break when you bend it. Stainless steel rods are not that expensive and you'll have enough to make six pairs of gauntlets. I buy 1.5mm by 300mm stainless steel rods.
The gauntlet has hinge slots at the back and front edges. Start at the back slot, work the rod through all the hinge points, and as soon as you see it coming out the front slot, back it off until it's flush with the back end where you started. Hold it in position, grab it with pliers, and slide it out. This gives you the exact length you need.
Now bend the rod. These pliers are like pliers and an anvil at the same time, which helps with bending. The 1.5mm rod is very easy to bend, certainly easier than 2mm rod.
Create a hook at one end by bending the rod about 90 degrees, leaving enough to crimp over the plastic edge. Trim off the excess if needed. You want to leave enough rod extending past the bend to hook over the edge of the hinge slot (usually about 1/4 inch or so).
Insert the rod back through the hinge slots, this time with your bent hook catching on the back edge. Work the rod all the way through until the hook is seated. Then bend the front end the same way to create a hook that secures the front edge.
With piano wire this is tricky because it has a tendency to break. That's why I really recommend the stainless steel rods.
The gauntlets are pressure fit. The bottom is printed just slightly wider than the top. You give them a squeeze, they open up, you put your arm in, close them, give them a little push, and they hook together. You're good to go.
Flamethrower Assembly with Brass Tubing
The flamethrower uses 1/16 inch diameter brass tubes. Hobby brass. You can find these at Ace, Lowe's, and probably Home Depot in their hardware or metal section.
I get 1 foot sections, sometimes 3 foot sections if they have them. That's a great deal if you're doing multiple builds.
Measurements:
Long tube: 4 and 1/16 inch (just over 4 inches)
Short tube: 1 and 3/4 inch
You can go slightly longer on both by a 16th of an inch or a 32nd of an inch.
Cutting Brass Tubing
You can use a jigsaw, scroll saw, band saw, or little miter saw. I started with a hobby saw but it doesn't cut perfectly straight. If you use this, make sure you make your cut so you have at least one good factory-cut end for the visible part of the assembly.
The better way is with a tubing cutter. Mark the length you need on the tube, fit the cutter around it, and rotate while gradually tightening. It cuts clean and square. Way easier than a hand saw.
Assembly Order
The flamethrower has several components that stack onto the brass tubes. Here's the order:
For the long tube (4+ inches):
Base piece (the foundation where everything mounts)
Heavy cylinder (slides over the long tube)
Two-piece section with windows (the pointed end of this piece should face outward, away from the base)
Heat sink looking piece (can be oriented to your preference)
Emitter or nozzle piece
Tip (final piece)
The brass tube should extend all the way through so it's flush with the end of the tip. This is critical for the look.
For the short tube (1 3/4 inches): The short tube inserts into the pointed section of the windowed piece and terminates inside that component. It doesn't extend all the way through.
You can position the two tubes with the large flame emitter (long tube assembly) on top and the smaller one (short tube) on the bottom, or flip it. You can also space the decorative pieces out along the tubes if you want to show more brass. There are lots of options here.
Once you're happy with the positioning, put a small dab of glue at connection points to secure everything.
Screw Specifications
Here's what you need:
Whistling Birds (Dindjarin style): 16mm M3 button head screws (you'll need two per whistling bird unit) Whistling Birds (Boba Fett style): 10mm and 12mm M3 screws
Flamethrower: 12mm M3 screws
Whip cord: 12mm M3 screws
All M3. You put the base on first, then screw it together using the threaded inserts you installed earlier.
The whistling birds are hollow, designed to take the universal whistling bird light-up units from Concordia Arms on Etsy. If you use those electronics, you'll want to remove the center block inside the whistling bird housing (it's designed to snap out).
There's a hole in the front of the whistling bird housing. If you drill a small pilot hole just bigger than 1/8 inch (or just smaller), you can thread a screw directly into the plastic without a threaded insert. You could also make a pilot hole and heat set a threaded insert if you prefer.
The holes go all the way through the housing, so you don't have to drill them out. It'll be a tight fit, but it'll work. The housing doesn't fit the motorized whistling bird units (not big enough), but it will accommodate the static ones that turn on in sequence. That's a pretty cool effect.
Final Thoughts
You don't have to build these exactly like me. There are plenty of ways you can explore your creativity with these gauntlets and create something totally unique and totally yours.
If you've still got questions, let me hear from you in the comments. What challenges did you run into during assembly? Any clever solutions you came up with for the heat setting process or the brass tube work? Share them with the community.
For visual demonstrations of the tray installation, hinge bending technique, and brass tube positioning, watch the full assembly video on YouTube.
This post contains affiliate links, which means I may receive a commission if you click a link and purchase something I've recommended. This comes at no extra cost to you. I only recommend products and tools I personally use in my workshop. All opinions are my own.
© Mando Armory 2026. All rights reserved.